Tag: crypto trading

  • Build a Trading Plan Before You Trade: A Beginner’s Guide

    Build a Trading Plan Before You Trade: A Beginner’s Guide

    Have you ever entered a crypto trade because the price was rising, only to panic when the market suddenly moved in the opposite direction?

    This often happens when traders make decisions without a clear plan.

    Cryptocurrency markets can move quickly. Prices fluctuate, emotions influence decisions, and unexpected market events can change trading conditions. Without preparation, it becomes easy to enter trades impulsively or take risks you do not fully understand.

    That is why every trader should build a trading plan before trading.

    A trading plan is a set of rules that guides your trading decisions. It helps you decide what to trade, when to enter, when to exit, and how much risk you are willing to take.

    Let’s understand how to create one.

    What is a Trading Plan?

    A trading plan is a personal framework that defines how you approach the market.

    It explains your trading goals, preferred strategy, entry and exit conditions, risk limits, and the rules you follow while managing a position.

    Instead of making decisions based on excitement or fear, you use predefined conditions to guide your actions.

    For example, before entering a Bitcoin trade, you might decide:

    • Why you want to enter the trade.
    • At what price or market condition you will enter.
    • Where you will place your stop-loss.
    • Where you plan to take profit.
    • How much money you are willing to risk.

    These decisions help you approach trading with greater discipline.

    Why should you build a Trading Plan before you trade?

    A trading plan does not guarantee profits. However, it can help you manage uncertainty and avoid unnecessary mistakes.

    1. Reduces Emotional Decisions

    Fear, greed, and FOMO can influence trading decisions.

    For example, a sudden price increase may tempt you to enter a trade without checking the market conditions.

    A trading plan encourages you to follow predefined rules instead of reacting emotionally.

    2. Helps Manage Risk

    Every trade involves risk. A plan helps you decide how much you are willing to lose before entering a position.

    This can prevent a single unsuccessful trade from affecting too much of your trading capital.

    3. Improves Consistency

    Following the same decision-making process makes it easier to evaluate your trading performance.

    You can identify which strategies work under certain conditions and where you need to improve.

    4. Prevents Impulsive Trading

    Without clear rules, traders may enter too many positions, chase price movements, or increase their trade size after a loss.

    A trading plan gives you a framework for deciding when to trade and when to stay out of the market.

    7 Steps to Build a Trading Plan

    You do not need a complicated strategy to get started. Begin with these seven steps.

    Step 1: Define Your Trading Goals

    First, understand why you want to trade.

    Are you interested in learning technical analysis? Do you want to practise short-term trading? Or are you exploring longer-term market strategies?

    Your goals should be realistic and measurable.

    For example:

    • Learn how to identify market trends.
    • Practise a strategy using a demo account.
    • Follow a defined risk limit for every trade.
    • Review trading performance every week.

    Avoid setting goals such as earning a fixed amount every day. Markets do not offer predictable returns.

    Step 2: Choose Your Trading Style

    Different trading styles require different levels of time, attention, and market analysis.

    Here are some common approaches:

    Trading StyleMeaning
    ScalpingTaking multiple short-term trades to capture small price movements
    Day TradingOpening and closing positions within the same day
    Swing TradingHolding positions for several days or weeks
    Position TradingHolding positions for longer periods based on broader market trends

    Choose a style that matches your available time, experience, and risk tolerance.

    You do not need to try every trading style. Start with one approach and understand how it works.

    Step 3: Select the Market and Trading Pair

    Decide which cryptocurrency or trading pairs you want to focus on.

    For example:

    • BTC/USDT
    • ETH/USDT
    • Other supported crypto trading pairs

    Before selecting a pair, consider its liquidity, trading volume, volatility, and the availability of reliable market information.

    Avoid trading unfamiliar assets simply because their prices are moving quickly.

    Step 4: Define Your Entry and Exit Rules

    This is one of the most important parts of a trading plan.

    Your entry rules explain when you will open a position. Your exit rules explain when you will close it.

    For example, you may decide to enter a trade only when:

    • The market shows a clear trend.
    • Your chosen technical indicators support the setup.
    • The price reaches a predefined support or resistance area.
    • The potential risk is acceptable.

    Next, decide where you will exit.

    Common exit tools include:

    Stop-Loss: A predefined price level that helps limit potential losses if the market moves against your position. It does not guarantee execution at the exact stop price.

    Take-Profit: A predefined level where you plan to close a position and secure gains.

    Always define these levels before entering a trade rather than deciding them during a sudden market movement.

    Step 5: Set Your Risk Management Rules

    A trading plan should explain how much risk you are willing to take.

    One common approach is to limit the amount of capital exposed to risk on a single trade.

    For example, suppose your trading account contains ₹10,000 and you choose to risk 1% on a trade.

    Your planned risk would be:

    ₹10,000 × 1% = ₹100

    This means you are planning to risk ₹100 on that trade, not that you will necessarily lose exactly ₹100. Slippage, fees, gaps, and execution conditions can affect the actual outcome.

    Also consider:

    • Maximum number of open positions.
    • Maximum daily or weekly loss.
    • Position size.
    • Leverage, if applicable.
    • Whether you should stop trading after reaching your loss limit.

    Remember, using leverage can increase both potential gains and losses.

    Step 6: Decide When Not to Trade

    A good trading plan also defines situations where you should stay out of the market.

    For example:

    • When market conditions are unclear.
    • When volatility is unusually high for your strategy.
    • When important news may create unpredictable movements.
    • When you are emotionally stressed or trying to recover previous losses.
    • When your setup does not meet your entry conditions.

    Not every market movement is an opportunity. Sometimes, waiting is the better decision.

    Step 7: Maintain a Trading Journal

    A trading journal helps you understand your decisions and improve your strategy over time.

    After every trade, record:

    • Trading pair.
    • Entry price.
    • Exit price.
    • Position size.
    • Stop-loss and take-profit levels.
    • Reason for entering the trade.
    • Final result.
    • Mistakes or lessons learned.

    Review your journal regularly. Look for repeated mistakes, emotional decisions, and patterns in your trading performance.

    Example of a Simple Trading Plan

    Let’s look at a hypothetical example to understand how a trading plan can work.

    Trading DetailExample
    Trading PairBTC/USDT
    Trading StyleSwing Trading
    Account Balance₹10,000
    Planned Risk1% per trade
    Maximum Planned Risk₹100
    Entry ConditionA predefined technical setup appears
    Stop-LossBelow the selected invalidation level
    Take-ProfitAt a predefined target
    ReviewAfter closing the trade

    This is only an educational example, not a trading recommendation. Actual position size should be calculated using the distance between entry and stop-loss, along with fees and other execution costs.

    Common Trading Plan Mistakes to Avoid

    Even traders who create a plan can make mistakes when they fail to follow it.

    Watch out for these habits:

    1. Changing Rules Mid-Trade: Moving your stop-loss further away because you do not want to accept a loss can increase your risk.

    2. Overtrading: Entering too many positions without valid setups can lead to unnecessary losses and fees.

    3. Ignoring Risk Management: Focusing only on potential profits while ignoring possible losses can put your trading capital at risk.

    4. Chasing the Market: Entering a trade simply because an asset is moving quickly can lead to poor decisions.

    5. Not Reviewing Performance: If you never analyse your previous trades, you may repeat the same mistakes.

    Frequently Asked Questions (FAQs)

    1. Why is a trading plan important in crypto?

    A trading plan helps you make structured decisions, manage risk, and avoid impulsive trading. It gives you a framework to follow in a volatile market.

    2. Can beginners create a trading plan?

    Yes. Beginners can start with simple rules covering trading goals, market selection, entry and exit conditions, and risk limits.

    3. Does a trading plan guarantee profits?

    No. A trading plan cannot predict market movements or guarantee successful trades. It helps traders manage their decisions and potential risks.

    4. How much should I risk on one crypto trade?

    There is no universal amount that suits every trader. Your risk limit should reflect your financial situation, experience, and risk tolerance. Some traders use a small percentage of their account as a planning guideline.

    5. How often should I review my trading plan?

    Review it regularly, such as weekly or monthly, and whenever your trading goals or market conditions change. Use your trading journal to identify areas for improvement.

    Disclaimer: This article is for educational purposes only and does not constitute financial or investment advice. Cryptocurrency trading involves significant risk, including the possible loss of your entire trading capital. Always understand the risks before trading.

  • Funding Rate in Crypto: Why Perpetual Futures Traders Watch It

    Funding Rate in Crypto: Why Perpetual Futures Traders Watch It

    Introduction

    If you have explored crypto futures trading, you may have come across a term called funding rate.

    You might have noticed that some traders pay funding fees while others receive them. But why does this happen? And how can a small percentage influence trading decisions?

    Funding rates are an important part of perpetual futures trading. They help keep the price of a perpetual contract close to the price of its underlying cryptocurrency.

    Unlike traditional futures contracts, perpetual futures do not have an expiry date. Therefore, exchanges use a funding mechanism to encourage the contract price to stay close to the spot market price.

    Let’s understand how funding rates work, why they change, and why traders monitor them.

    What is the Funding Rate in crypto?

    The funding rate is a periodic payment exchanged between traders holding long and short positions in perpetual futures contracts.

    It is not usually a fee paid directly to the exchange. Instead, the payment generally moves between traders on opposite sides of the contract.

    The direction of the payment depends on whether the funding rate is positive or negative.

    There are two main situations:

    • Positive funding rate: Traders holding long positions generally pay traders holding short positions.
    • Negative funding rate: Traders holding short positions generally pay traders holding long positions.

    The purpose is to help keep the perpetual futures price aligned with the underlying asset’s spot price.

    For example, if Bitcoin’s perpetual futures price trades significantly above its spot price, the funding mechanism may make holding long positions more expensive. This can encourage traders to reduce long exposure or take short positions.

    However, funding rates do not guarantee that the futures price will return to the spot price.

    How does the Funding Rate work?

    Funding payments usually happen at scheduled intervals. The exact timing depends on the exchange and the contract.

    For example, some platforms use an eight-hour funding interval, while others may use different schedules.

    Let’s understand both situations.

    1. Positive Funding Rate

    A positive funding rate generally means the perpetual futures price is trading at a premium to the spot price.

    In this situation:

    • Long-position holders pay funding.
    • Short-position holders receive funding.
    • Holding a long position may become more expensive.

    Example:

    Imagine a trader holds a Bitcoin perpetual futures position worth $10,000.

    The funding rate is +0.01%.

    The funding payment would be:

    $10,000 × 0.01% = $1

    The trader holding the long position pays $1, while the eligible trader on the short side receives the corresponding payment.

    2. Negative Funding Rate

    A negative funding rate generally indicates that the perpetual futures price is trading below the spot price.

    In this situation:

    • Short-position holders pay funding.
    • Long-position holders receive funding.
    • Holding a short position may become more expensive.

    Example:

    Imagine the same $10,000 position, but the funding rate is -0.01%.

    The funding payment would be:

    $10,000 × 0.01% = $1

    In this case, the short-position holder pays $1, while the eligible long-position holder receives the payment.

    Note: These examples assume the funding payment is calculated directly on the stated position value. Actual calculations depend on the exchange’s contract specifications, funding rules, and settlement method.

    Positive vs Negative Funding Rate

    Here is a simple comparison:

    FeaturePositive FundingNegative Funding
    Payment directionLongs pay shortsShorts pay longs
    Common interpretationLong demand may be strongerShort demand may be stronger
    Possible market conditionPerpetual contract trades at a premiumPerpetual contract trades at a discount
    Cost for long holdersPay fundingReceive funding
    Cost for short holdersReceive fundingPay funding

    Remember, funding rates are not guaranteed indicators of future price movements.

    Why do Funding Rates change?

    Funding rates change as market conditions and the difference between perpetual futures prices and spot prices change.

    Several factors can influence them.

    1. Demand for Long and Short Positions

    When many traders want to open long positions, buying pressure in the perpetual futures market may push the contract price above the spot price.

    This can contribute to a positive funding rate.

    Similarly, strong demand for short positions may push the perpetual price below the spot price, contributing to a negative funding rate.

    2. Market Sentiment

    During periods of strong bullish sentiment, traders may become more interested in leveraged long positions.

    As demand increases, positive funding rates may become more common.

    During periods of fear or bearish sentiment, traders may favour short positions, which can contribute to negative funding rates.

    3. Price Difference Between Spot and Futures Markets

    The difference between the perpetual futures price and the spot price is an important factor in funding rate calculations.

    When the perpetual contract trades above spot, funding may become positive. When it trades below spot, funding may become negative.

    However, exchanges use their own calculation methods, which may include additional components.

    4. Exchange-Specific Funding Rules

    Funding intervals, interest components, premium calculations, caps, and floors can vary across exchanges.

    Therefore, the same cryptocurrency may have different funding rates on different trading platforms.

    Always check the contract specifications before using funding data.

    Why do perpetual futures traders watch Funding Rates?

    Funding rates provide additional information about the derivatives market. Traders monitor them for several reasons.

    1. To Understand Market Positioning

    A consistently positive funding rate may suggest that long-position demand is strong relative to short-position demand.

    Likewise, sustained negative funding may suggest stronger demand for short exposure.

    This can help traders understand how participants are positioned.

    2. To Identify Crowded Trades

    Extremely high positive funding rates may indicate that many traders are paying to maintain long positions.

    If the market suddenly moves downward, leveraged long positions may face pressure.

    Similarly, very negative funding rates may indicate crowded short positioning.

    However, crowded positioning does not automatically lead to a liquidation cascade or price reversal.

    3. To Understand the Cost of Holding a Position

    Funding payments can add to the cost of maintaining a perpetual futures position.

    For example, a trader who holds a long position through several positive funding intervals may repeatedly pay funding.

    Therefore, funding rates matter when calculating the potential cost of a trade, especially when holding positions for longer periods.

    4. To Compare Market Conditions

    Traders may compare funding rates across different cryptocurrencies or exchanges.

    For example, Bitcoin may have a positive funding rate while another cryptocurrency has a negative rate.

    These differences can provide additional context about demand and positioning in different markets.

    Funding Rate vs Trading Fee: What’s the Difference?

    Beginners sometimes confuse funding payments with trading fees. However, they serve different purposes.

    FeatureFunding RateTrading Fee
    PurposeHelps align perpetual futures prices with spot pricesCovers the cost of executing trades on a platform
    PaymentGenerally exchanged between long and short holdersPaid to the exchange
    When chargedAt scheduled funding intervalsWhen a trade is executed, depending on the fee structure
    Depends onFunding rate and position valueTrading volume and fee tier
    Applies toPerpetual futures contractsTrading activity across applicable markets

    A trader may pay both a trading fee and a funding payment when trading perpetual futures.

    How to use Funding Rates in market analysis?

    Funding rates are more useful when combined with other market indicators.

    Here are some practical ways traders analyse them.

    1. Compare funding rates with price movements. If prices rise while funding becomes extremely positive, traders may investigate whether long positioning is becoming crowded.

    2. Check Open Interest. Rising open interest alongside high positive funding may suggest growing participation in leveraged long positions. However, open interest alone does not reveal which side dominates.

    3. Monitor Trading Volume. Volume helps show how much trading activity is taking place alongside changes in funding.

    4. Compare funding across exchanges. Different funding rates may reflect differences in positioning, liquidity, or calculation methods.

    5. Consider the holding period. A funding payment that seems small for one interval may become significant if a position is held across many intervals.

    Common Mistakes Beginners Should Avoid

    Before using funding rates in trading decisions, understand these common mistakes:

    • Assuming positive funding means prices will rise: It may indicate stronger long demand, but it does not predict future price direction.
    • Assuming negative funding guarantees a price rebound: A negative rate does not mean the market must recover.
    • Ignoring funding costs: Repeated payments can reduce the profitability of a trade.
    • Comparing rates without checking intervals: Different exchanges may use different funding schedules.
    • Treating funding as an exchange trading fee: Funding is generally exchanged between eligible long and short position holders.
    • Relying on funding alone: Combine it with price action, open interest, volume, and risk management.

    Frequently Asked Questions (FAQs)

    1. What is a funding rate in crypto?

    A funding rate is a periodic payment exchanged between long and short traders in perpetual futures markets. It helps keep the contract price close to the underlying asset’s spot price.

    2. What does a positive funding rate mean?

    A positive funding rate generally means long-position holders pay short-position holders. It often indicates that the perpetual contract is trading above the spot price.

    3. What does a negative funding rate mean?

    A negative funding rate generally means short-position holders pay long-position holders. It often indicates that the perpetual contract is trading below the spot price.

    4. How often are funding payments made?

    Funding intervals vary by exchange and contract. Some platforms use eight-hour intervals, while others may use different schedules.

    5. Can funding rates predict Bitcoin’s price?

    No. Funding rates can provide clues about derivatives market positioning, but they cannot reliably predict future Bitcoin price movements.

    6. Do traders pay funding fees when their positions are closed?

    Funding payments generally apply to eligible positions held at the funding settlement time. If a position is closed before that time, the trader may not be included in that funding settlement, depending on the exchange’s rules.

    Disclaimer: This article is for educational purposes only and does not provide financial or investment advice. Crypto futures trading involves significant risks, particularly when leverage is used. Funding rules vary by exchange. Always review contract specifications before trading.

  • What is a Crypto Market Heatmap? A Beginner’s Guide

    What is a Crypto Market Heatmap? A Beginner’s Guide

    Introduction

    Have you ever opened a crypto market platform and seen a screen filled with green and red boxes of different sizes? That visual display is called a crypto market heatmap.

    A crypto market heatmap helps traders and investors understand market movements at a glance. Instead of checking the price of each cryptocurrency separately, you can quickly see which assets are gaining, which are losing, and how the broader market is performing.

    But a heatmap is more than a colourful chart. It presents market information in a visual format, making it easier to compare cryptocurrencies and identify trends.

    Let’s understand how it works and how beginners can use it.

    What Is a Crypto Market Heatmap?

    A crypto market heatmap is a visual tool that displays the performance of multiple cryptocurrencies using coloured blocks or tiles.

    Each block represents a cryptocurrency. Its colour usually indicates price movement, while its size may represent market capitalisation, trading volume, or another selected metric.

    Most commonly:

    • Green: The cryptocurrency has gained value during the selected period.
    • Red: The cryptocurrency has lost value during the selected period.
    • Darker shades: Often indicate a larger percentage movement.
    • Larger blocks: Usually represent assets with a higher value or greater market share, depending on the heatmap settings.

    For example, Bitcoin may appear as a large green block while several smaller altcoins appear in red. This tells you that Bitcoin is performing positively during the selected period, while those altcoins are declining.

    However, the exact colours and block sizes depend on the platform and its settings.

    How Does a Crypto Heatmap Work?

    A heatmap takes market data and converts it into a visual layout.

    Most crypto heatmaps use three important elements:

    1. Colour

    Colour represents the direction and sometimes the magnitude of price movement.

    • Green indicates a price increase.
    • Red indicates a price decrease.
    • Neutral shades may indicate little or no movement.

    The intensity of the colour can show how strong the movement is. For example, a dark green tile may represent a larger gain than a light green one.

    2. Size

    The size of each tile depends on the metric selected by the platform.

    For example, a market-cap-based heatmap may give Bitcoin a much larger tile than a smaller cryptocurrency because Bitcoin has a higher market capitalisation.

    A volume-based heatmap may instead display larger tiles for assets with higher trading activity.

    3. Time Period

    Heatmaps allow users to select different time periods, such as:

    • 1 hour
    • 24 hours
    • 7 days
    • 30 days

    The selected period matters because an asset may show a gain over 24 hours but a loss over the past seven days.

    Always check the timeframe before interpreting the colours.

    Example: Understanding a Crypto Market Heatmap

    Imagine you are looking at a heatmap showing the 24-hour performance of five cryptocurrencies.

    Cryptocurrency24-Hour ChangeHeatmap Colour
    Bitcoin (BTC)+4.5%Dark Green
    Ethereum (ETH)+2.2%Light Green
    Solana (SOL)-1.8%Light Red
    XRP-3.5%Dark Red
    Cardano (ADA)+0.5%Slight Green

    What can you understand from this example?

    • Bitcoin has recorded the strongest gain among these five assets.
    • Ethereum is also trading higher, but its gain is smaller.
    • Solana and XRP are showing negative performance.
    • Cardano has moved only slightly.

    In a few seconds, you can compare the performance of several assets without opening five separate price charts.

    Remember, these figures are only an illustrative example, not live market data.

    Different Types of Crypto Market Heatmaps

    Not every heatmap shows the same information. Depending on the platform, you may find different types.

    1. Market Capitalisation Heatmap

    This heatmap displays cryptocurrencies based on their market capitalisation.

    Larger blocks generally represent cryptocurrencies with a higher market value. Colour indicates whether their prices are rising or falling.

    It is useful for understanding how major cryptocurrencies are performing compared with smaller assets.

    2. Trading Volume Heatmap

    A volume-based heatmap highlights trading activity across different cryptocurrencies.

    It helps users identify which assets are attracting more trading activity during a selected period.

    However, high trading volume does not automatically mean that an asset’s price will increase.

    3. Price Performance Heatmap

    This type focuses on percentage price changes over a selected timeframe.

    It helps traders quickly identify the strongest and weakest performers in the market.

    4. Liquidation Heatmap

    A liquidation heatmap is different from a standard market-performance heatmap.

    It estimates potential liquidation levels for leveraged trading positions based on market data and a platform’s methodology.

    Traders may use it to study areas where leveraged positions could face liquidation. However, these levels are estimates, not guaranteed price targets or predictions.

    Why Do Crypto Traders Use Heatmaps?

    A heatmap can make market analysis easier, especially when you want to compare several cryptocurrencies.

    Here are four common uses.

    1. Identify Market Trends

    A heatmap can help you understand whether most cryptocurrencies are moving upward or downward.

    If many large cryptocurrencies appear green, the market may be experiencing broad positive momentum. If most appear red, selling pressure may be widespread.

    2. Compare Cryptocurrency Performance

    You can quickly compare Bitcoin, Ethereum, and other altcoins.

    For example, if Bitcoin is gaining while several altcoins are declining, it may suggest that Bitcoin is showing relative strength during that period.

    3. Find Assets for Further Research

    Heatmaps can help you identify assets showing unusually strong gains, losses, or trading activity.

    However, a cryptocurrency appearing dark green does not automatically make it a good investment or trading opportunity. Always investigate the reason behind the movement.

    4. Save Time During Market Analysis

    Instead of opening multiple charts, you can use one heatmap to get a broad overview of market activity.

    This makes it a useful starting point for daily market analysis.

    Heatmap vs Traditional Price Chart

    Both tools help users understand market movements, but they serve different purposes.

    FeatureCrypto HeatmapPrice Chart
    Main purposeCompare multiple assets visuallyStudy the price movement of an asset
    DisplayColoured blocks or tilesLines, candles, or bars
    Best forMarket overview and comparisonDetailed price analysis
    Shows price directionYes, through colourYes, through chart movement
    Technical indicatorsUsually limitedOften supports multiple indicators

    A heatmap gives you a quick overview, while a price chart helps you examine an asset in greater detail.

    Common Mistakes Beginners Should Avoid

    Although heatmaps are easy to read, beginners can misinterpret the information.

    1. Assuming green means buy: A green tile only shows positive performance during a selected period. It does not guarantee future gains.

    2. Ignoring the timeframe: A cryptocurrency may be up over one hour but down over seven days. Always check the selected period.

    3. Confusing size with performance: A larger tile does not necessarily mean a stronger price increase. It may simply represent higher market capitalisation or volume.

    4. Following the biggest mover blindly: An asset with a sharp price increase may also experience a quick reversal. Research before making a decision.

    5. Treating heatmaps as prediction tools: Heatmaps display market information. They do not tell you exactly what will happen next.

    Frequently Asked Questions (FAQs)

    1. What does green mean on a crypto heatmap?

    Green generally indicates that a cryptocurrency has gained value during the selected timeframe. Darker green may represent a larger percentage increase.

    2. What does red mean on a crypto heatmap?

    Red generally indicates that an asset’s price has declined during the selected period. The shade may indicate the size of the decline.

    3. Are crypto heatmaps useful for beginners?

    Yes. They provide a simple visual overview of market movements and help beginners compare multiple cryptocurrencies without studying individual charts first.

    4. Does a larger heatmap block mean better performance?

    No. Block size usually represents a selected metric, such as market capitalisation or trading volume. It does not necessarily indicate a higher price gain.

    5. Can I use a crypto heatmap to predict prices?

    No. A heatmap displays current or historical market information. It cannot reliably predict future price movements.

    Disclaimer: This article is for educational purposes only and does not provide financial or investment advice. Cryptocurrency markets are volatile. Always conduct your own research before making trading or investment decisions.

  • What is the Long-Short Ratio? A Beginner’s Guide

    What is the Long-Short Ratio? A Beginner’s Guide

    Introduction

    Crypto prices can move in either direction. While some traders expect prices to rise, others believe the market will fall. As a result, traders take different positions based on their market expectations.

    But how can you understand whether more traders are betting on rising or falling prices?

    One useful metric is the long-short ratio. It helps traders understand the balance between long and short positions in a market. Moreover, it can offer insight into market sentiment and how traders are positioning themselves.

    However, the ratio does not predict future price movements. Instead, it shows how positions are distributed across a particular market, platform, or group of traders.

    In this lesson, we will explain what the long-short ratio means, how it works, how to interpret it, and what its limitations are.

    What is the Long-Short Ratio?

    The long-short ratio is a trading indicator that compares the number or volume of long positions with the number or volume of short positions.

    In crypto trading:

    • Long position: A trader opens a position expecting the asset’s price to rise.
    • Short position: A trader opens a position expecting the asset’s price to fall.

    Therefore, the long-short ratio helps show which side has greater representation among the positions included in the data.

    For example, if a platform reports more long positions than short positions, its long-short ratio may be above 1. On the other hand, if short positions are more common, the ratio may be below 1.

    How is the Long-Short Ratio calculated?

    The basic formula is:

    Long-Short Ratio = Number of Long Positions ÷ Number of Short Positions

    Let’s understand this with a simple example.

    Imagine a crypto trading platform reports:

    • 600 long positions
    • 400 short positions

    The calculation would be:

    600 ÷ 400 = 1.5

    This means there are 1.5 long positions for every short position in the measured group.

    However, not every platform calculates the metric in exactly the same way. Some use the number of accounts or traders on each side, while others compare long and short position sizes or trading volume.

    Therefore, always check the methodology before interpreting the ratio.

    How to read the Long-Short Ratio?

    The ratio generally falls into three broad categories:

    1. Ratio Above 1: More Long Positions

    When the ratio is above 1, the measured data shows more long positions than short positions.

    For example, a ratio of 2 means there are two long positions for every short position, if the metric uses position counts.

    This may suggest bullish positioning among the traders included in the data. However, it does not guarantee that prices will increase.

    2. Ratio Below 1: More Short Positions

    When the ratio is below 1, short positions outnumber long positions in the measured data.

    For instance, a ratio of 0.5 means there is one long position for every two short positions.

    As a result, the data may indicate more bearish positioning. Nevertheless, this does not automatically mean the market will fall.

    3. Ratio Around 1: A More Balanced Distribution

    When the ratio is close to 1, long and short positions are relatively balanced.

    For example, a ratio of 1.05 indicates that the measured long side is only slightly larger than the short side.

    However, a balanced ratio does not mean the market is stable. Prices can still experience significant movements.

    Example: Understanding the Long-Short Ratio in Crypto

    Suppose you are observing Bitcoin futures trading on a platform.

    The platform reports the following account positions:

    Position TypeNumber of Accounts
    Long accounts700
    Short accounts300
    Total accounts1,000

    The long-short ratio is:

    700 ÷ 300 = 2.33

    This means there are approximately 2.33 long accounts for every short account.

    Therefore, the data shows that more accounts are positioned for a potential Bitcoin price increase.

    However, this information alone is not enough to make a trading decision. You should also consider trading volume, open interest, funding rates, price action, and other market information.

    Why does the Long-Short Ratio matter?

    The long-short ratio can help traders understand how market participants are positioning themselves. Here are some of its common uses.

    1. Understanding Market Sentiment

    The ratio offers a snapshot of bullish and bearish positioning.

    For example, a consistently high ratio may indicate that many traders are expecting prices to rise. Similarly, a low ratio may suggest that bearish positions are more common.

    As a result, traders can use it as one input when assessing market sentiment.

    2. Identifying Crowded Positions

    When a large number of traders take the same side, the market may become heavily positioned in one direction.

    However, crowded positioning can create risks. If prices move against those traders, some may close their positions quickly.

    Consequently, this can contribute to sudden buying or selling pressure.

    3. Understanding Potential Short Squeezes

    A short squeeze happens when rising prices force some short sellers to close their positions. To close a short position, a trader generally needs to buy back the asset or contract.

    Therefore, a wave of short-position closures can add further buying pressure.

    The long-short ratio may help identify whether short positioning is relatively high. Nevertheless, the ratio alone cannot predict a short squeeze.

    4. Supporting Trading Analysis

    Traders may compare the long-short ratio with other indicators to build a broader market picture.

    For example, they may examine:

    • Open Interest: Shows the number of outstanding derivative contracts.
    • Trading Volume: Shows how much trading activity has taken place.
    • Funding Rate: Shows periodic payments between long and short traders in certain perpetual futures markets.
    • Price Action: Shows how the asset’s price has moved over time.

    Together, these indicators can provide more context than the long-short ratio alone.

    Long-Short Ratio vs Open Interest

    These two metrics are related to derivatives trading, but they measure different things.

    FeatureLong-Short RatioOpen Interest
    What it measuresRelative long and short positioningOutstanding derivative contracts
    Main purposeUnderstand positioning and sentimentUnderstand the amount of open contracts
    InterpretationShows which side is more represented in the measured dataShows how many contracts remain open
    Can it predict price direction?NoNo

    In simple terms, the long-short ratio tells you how long and short positions compare, while open interest tells you how many derivative contracts remain active.

    Limitations of the Long-Short Ratio

    Although the long-short ratio can be useful, it has several limitations.

    First, it does not predict price movements. A high long-short ratio does not guarantee a price increase. Likewise, a low ratio does not guarantee a decline.

    Second, different platforms may use different calculations. Some compare accounts, while others compare position sizes. Therefore, two platforms may show different readings for the same asset.

    Third, it may represent only a limited group of traders. A platform-specific ratio does not necessarily reflect the entire crypto market.

    Finally, positioning can change quickly. Traders can open or close positions as market conditions change. Consequently, an earlier reading may no longer represent current sentiment.

    For these reasons, avoid using this metric in isolation.

    Common Mistakes to Avoid

    When using the long-short ratio, beginners should avoid these common mistakes:

    • Assuming a ratio above 1 guarantees a bullish market.
    • Treating a ratio below 1 as a definite bearish signal.
    • Comparing figures from platforms that use different methodologies.
    • Ignoring open interest, volume, and funding rates.
    • Making trading decisions based on a single indicator.

    Instead, use the ratio as supporting information alongside your research and trading plan.

    Frequently Asked Questions (FAQs)

    1. What does a long-short ratio of 2 mean?

    If the ratio is based on position counts, a value of 2 means there are two long positions for every short position in the measured group.

    2. Is a high long-short ratio bullish?

    It generally indicates that more traders are positioned on the long side. However, it does not guarantee that the market will move upward.

    3. Can the long-short ratio predict Bitcoin’s price?

    No. It provides information about trader positioning, but it cannot reliably predict Bitcoin’s future price.

    4. Where can I check the long-short ratio?

    You can find it on some cryptocurrency derivatives data platforms and exchange analytics dashboards. However, check the calculation method and data coverage before comparing readings.

    5. Is the long-short ratio useful for beginners?

    Yes. It can help beginners understand market positioning and sentiment. Nevertheless, it should be treated as one analytical tool rather than a standalone trading signal.

    Disclaimer: This article is for educational purposes only and does not provide financial or investment advice. Cryptocurrency derivatives involve significant risks. Always conduct your own research and understand the risks before trading.
  • Risk-Reward Ratio Explained: A Beginner’s Trading Guide

    Introduction

    Every crypto trade involves uncertainty. Prices can move in your favour, but they can also move against you. Therefore, traders need a clear plan for managing potential losses and evaluating possible returns.

    One useful concept is the risk-reward ratio. It helps traders compare how much they are willing to risk on a trade with how much they expect to gain if the trade goes as planned.

    For example, if you are willing to risk ₹100 to potentially earn ₹300, your risk-reward ratio is 1:3.

    However, a higher risk-reward ratio does not guarantee profits. Traders must also consider their win rate, trading costs, market conditions, and execution.

    In this lesson, you will learn what the risk-reward ratio means, how to calculate it, and how traders use it when planning crypto trades.

    What Is the Risk-Reward Ratio?

    The risk-reward ratio compares the potential loss of a trade with its potential profit.

    • Risk: The amount you may lose if the trade reaches your planned stop-loss level.
    • Reward: The amount you may gain if the trade reaches your planned target.

    Traders commonly express this ratio as 1:2, 1:3, or 1:4.

    For example, a 1:2 risk-reward ratio means you are planning to risk ₹1 for a potential reward of ₹2.

    This calculation helps traders evaluate whether a trade offers a reasonable potential reward relative to its planned risk.

    How to Calculate the Risk-Reward Ratio

    You can calculate the risk-reward ratio using a simple formula:

    Risk-Reward Ratio = Potential Loss ÷ Potential Profit

    Let’s understand this with an example.

    Imagine you plan to buy a cryptocurrency at ₹500.

    • Entry price: ₹500
    • Stop-loss price: ₹480
    • Target price: ₹560

    Your potential risk per unit is:

    ₹500 − ₹480 = ₹20

    Your potential reward per unit is:

    ₹560 − ₹500 = ₹60

    Therefore:

    ₹20 ÷ ₹60 = 1:3

    This means you are risking ₹20 for a potential gain of ₹60.

    The trade has a planned risk-reward ratio of 1:3.

    This example excludes trading fees, slippage, funding payments, and other costs. Actual results may differ.

    Common Risk-Reward Ratios Explained

    Traders use different ratios depending on their strategies, market conditions, and trading objectives.

    Risk-Reward RatioAmount RiskedPotential Reward
    1:1₹100₹100
    1:2₹100₹200
    1:3₹100₹300
    1:4₹100₹400
    1:5₹100₹500

    For example, a 1:3 ratio means the potential reward is three times the planned risk.

    However, a higher ratio is not automatically better. A very distant profit target may be less likely to get reached. Therefore, traders should consider realistic price targets rather than choosing a ratio simply because it looks attractive.

    Why Is the Risk-Reward Ratio Important?

    The risk-reward ratio helps traders make more structured decisions before entering a trade.

    1. Helps Evaluate Potential Trades

    Before opening a position, traders can compare the possible loss with the expected gain.

    For instance, if a trade offers a potential reward of ₹100 but requires risking ₹200, a trader may decide that the setup does not meet their trading plan.

    2. Encourages Better Risk Management

    A predefined risk-reward ratio encourages traders to identify their entry, stop-loss, and target levels in advance.

    As a result, they can avoid making decisions based only on emotions or sudden market movements.

    3. Helps Understand the Required Win Rate

    Your win rate is the percentage of trades that close with a profit.

    The risk-reward ratio and win rate work together to determine whether a trading strategy can be profitable over time.

    For example, a trader using a 1:2 ratio does not necessarily need to win every trade to achieve a positive result.

    However, trading fees and losses must also be considered.

    4. Reduces Impulsive Decisions

    Having a predefined target and stop-loss can help traders avoid changing their plans because of fear, greed, or market excitement.

    Nevertheless, no ratio can eliminate the emotional challenges of trading.

    Understanding Risk-Reward Ratio and Win Rate

    A common misconception is that traders must win most of their trades to make a profit.

    In reality, the required win rate depends partly on the risk-reward ratio.

    For example, consider a trader who risks ₹100 to potentially earn ₹200 on every trade.

    ResultAmount
    Profit from one winning trade₹200
    Loss from one losing trade₹100
    Winning trades4
    Losing trades6
    Total profit₹800
    Total loss₹600
    Net result₹200

    In this simplified example, the trader wins only 4 out of 10 trades but still makes ₹200 before trading costs.

    This demonstrates why both win rate and risk-reward ratio matter.

    What Is the Break-Even Win Rate?

    The break-even win rate is the percentage of winning trades required to cover losses over time, before trading costs.

    The simplified formula is:

    Break-Even Win Rate = Risk ÷ (Risk + Reward) × 100

    For a 1:2 risk-reward ratio:

    ₹100 ÷ (₹100 + ₹200) × 100 = 33.33%

    This means a trader needs to win approximately 33.33% of trades to break even before fees and other costs, assuming every trade follows the planned risk and reward amounts.

    In practice, the required win rate may be higher because of fees, slippage, funding payments, and execution differences.

    Risk-Reward Ratio vs Position Sizing

    Although these concepts are connected, they serve different purposes.

    FeatureRisk-Reward RatioPosition Sizing
    MeaningCompares potential loss with potential profitDetermines how much of an asset to trade
    Main purposeEvaluates a trade’s potential payoffControls the amount of capital exposed
    Depends onEntry, stop-loss, and targetAccount size, risk limit, and stop-loss distance
    ExampleRisk ₹100 to potentially earn ₹300Buy 10 units based on the planned risk

    For effective risk management, traders should understand both concepts rather than relying on the risk-reward ratio alone.

    Common Mistakes Beginners Should Avoid

    Even though the calculation is simple, beginners can misunderstand how to use it.

    Avoid these mistakes:

    • Choosing unrealistic profit targets just to achieve a higher ratio.
    • Ignoring the possibility that a stop-loss may execute at a different price.
    • Forgetting trading fees and funding costs.
    • Assuming a 1:3 ratio guarantees profits.
    • Ignoring the win rate of a trading strategy.
    • Increasing position size because a trade appears to offer a favourable ratio.

    Instead, use realistic price levels and calculate your potential risk before entering a position.

    Frequently Asked Questions

    What is a good risk-reward ratio in crypto trading?

    There is no universally ideal ratio. Some traders use 1:2 or 1:3 as planning benchmarks, but the appropriate ratio depends on the strategy, market conditions, and probability of reaching the target.

    Is a 1:3 risk-reward ratio better than 1:2?

    A 1:3 ratio offers a larger potential reward relative to the planned risk. However, the profit target may be harder to reach. Therefore, the win rate and market conditions also matter.

    Can I make a profit with a low win rate?

    Yes. A strategy with a favourable risk-reward ratio may remain profitable even with a lower win rate. However, actual performance depends on execution, trading costs, and consistency.

    Does risk-reward ratio guarantee profits?

    No. It is a planning tool, not a prediction. Market movements, slippage, fees, and unexpected volatility can affect actual results.

    Should beginners use a risk-reward ratio?

    Understanding this concept can help beginners plan trades more carefully. However, they should also learn position sizing, stop-loss orders, and basic risk management before trading with real money.

    Disclaimer: This article is for educational purposes only and does not constitute financial or investment advice. Cryptocurrency trading involves significant risk, and you may lose some or all of your trading capital.

  • Open Interest vs Trading Volume: What is the difference?

    Open Interest vs Trading Volume: What is the difference?

    Introduction

    When analysing the cryptocurrency market, traders often look at trading volume and open interest to understand market activity. Although both indicators provide useful information, they measure different things.

    Trading volume shows how much trading activity takes place during a specific period. In contrast, open interest measures the number or value of outstanding derivative contracts that remain open.

    Understanding the difference between these indicators can help beginners interpret futures market activity more carefully.

    In this lesson, you will learn what open interest and trading volume mean, how they work, and how traders use them to understand market conditions.

    What is Trading Volume in Crypto?

    Trading volume refers to the total quantity or value of an asset traded during a specific period.

    For example, if traders buy and sell 100 BTC during a particular day, the reported trading volume may be 100 BTC, depending on the platform’s reporting method.

    Trading volume helps show how active a market is.

    Why Does Trading Volume Matter?

    Trading volume can provide useful information about market activity.

    • Market activity: Higher volume generally indicates more trading activity.
    • Price movements: A significant price movement accompanied by higher volume may indicate stronger participation.
    • Liquidity assessment: Volume can offer clues about market activity, although it does not guarantee sufficient liquidity.
    • Trend analysis: Traders may compare volume with price movements to understand market behaviour.

    However, high trading volume does not automatically mean that a market is healthy or that prices will continue moving in the same direction.

    What is Open Interest in Crypto?

    Open interest refers to the total number or value of outstanding derivative contracts that have not been closed, settled, or expired.

    It is commonly used in futures and perpetual futures markets.

    For example, imagine traders open 100 new futures contracts. If none of these contracts are closed or settled, open interest increases by 100 contracts.

    However, when existing positions are closed, open interest decreases.

    How Does Open Interest Change?

    Open interest changes when traders create or close derivative positions.

    Trading activityEffect on open interest
    Both sides open new positionsIncreases
    Both sides close existing positionsDecreases
    One trader opens while another closesGenerally remains unchanged

    Remember that every futures contract has both a buyer and a seller. Open interest counts the outstanding contract once, not once for each side.

    Why Does Open Interest Matter?

    Open interest helps traders understand how much derivative exposure remains active in the market.

    For example:

    • Rising open interest may indicate that new positions are being created.
    • Falling open interest may indicate that existing positions are being closed or settled.
    • High open interest indicates a large number or value of outstanding contracts.

    Nevertheless, open interest does not reveal whether the market is dominated by bullish or bearish traders. Every open contract has both a long and a short side.

    Open Interest vs Trading Volume: Key Differences

    Although both indicators measure market activity, they provide different information.

    FeatureTrading VolumeOpen Interest
    MeaningTotal trading activity during a periodOutstanding derivative contracts
    MeasuresHow much was tradedHow many contracts remain open
    Applies toSpot and derivatives marketsPrimarily derivatives markets
    Changes whenTrades take placePositions are opened or closed
    Time referenceUsually measured over a selected periodRepresents outstanding positions at a given time
    Main purposeUnderstand trading activityUnderstand active derivative exposure

    In simple terms, trading volume tells you how much trading has happened, while open interest tells you how many derivative contracts remain active.

    How to Interpret Open Interest and Trading Volume Together?

    Traders often examine both indicators alongside price movements. This combination can provide additional context about market participation.

    Here are four common situations:

    1. Price Rises, Open Interest Rises, and Volume Increases

    This combination may indicate growing market participation alongside an upward price movement.

    For example, new positions may be entering the market while buying activity increases.

    However, rising open interest does not confirm that all new positions are bullish. Every contract has both long and short exposure.

    2. Price Falls, Open Interest Rises, and Volume Increases

    This situation may indicate growing derivative activity during a downward price movement.

    New positions may be entering the market. Nevertheless, open interest alone cannot tell you whether traders are opening fresh short positions or taking the opposite side of existing activity.

    3. Price Rises While Open Interest Falls

    This combination may suggest that existing positions are closing while prices move higher.

    For instance, short positions may be getting closed, contributing to buying activity. However, additional information is needed to confirm the reason behind the movement.

    4. Price Falls While Open Interest Falls

    This may indicate that traders are reducing their existing exposure during a market decline.

    For example, long positions may be closing. Still, the indicators alone cannot establish exactly which positions are being closed.

    Important: These combinations are possible interpretations, not guaranteed trading signals. Always consider market conditions, funding rates, liquidity, and other relevant information.

    Practical Example: Understanding Both Indicators

    Imagine a Bitcoin perpetual futures market shows the following activity:

    IndicatorEarlier readingLater reading
    Trading volume5,000 BTC8,000 BTC
    Open interest20,000 BTC23,000 BTC

    In this example, trading volume increased from 5,000 BTC to 8,000 BTC. This indicates greater reported trading activity during the selected period.

    Meanwhile, open interest increased from 20,000 BTC to 23,000 BTC. This means the amount of outstanding contract exposure also increased.

    Together, these readings suggest that trading activity increased while more derivative contracts remained open.

    However, they do not reveal whether the market will move up or down next.

    Common Mistakes Beginners Should Avoid

    Open interest and trading volume can be useful indicators, but misinterpreting them can lead to poor trading decisions.

    Avoid these common mistakes:

    • Assuming high trading volume always means a price increase.
    • Treating rising open interest as proof of bullish sentiment.
    • Confusing trading volume with the number of active contracts.
    • Ignoring the selected time period when comparing volume.
    • Using open interest alone to predict market direction.
    • Assuming high open interest automatically means strong liquidity.

    Instead, combine these indicators with price action, liquidity, funding rates, and your overall trading plan.

    Frequently Asked Questions

    Is open interest the same as trading volume?

    No. Trading volume measures how much trading takes place during a period, while open interest measures outstanding derivative contracts that remain open.

    Does rising open interest mean the market is bullish?

    Not necessarily. Rising open interest indicates that outstanding contracts are increasing. It does not reveal whether the overall market is bullish or bearish.

    Can trading volume increase while open interest decreases?

    Yes. Traders can actively trade while closing existing positions. Therefore, trading volume may increase even as open interest declines.

    Is high open interest good for crypto trading?

    High open interest indicates substantial outstanding derivative exposure. However, it does not automatically mean the market has strong liquidity or lower risk.

    Why do traders monitor open interest and trading volume together?

    These indicators provide different information. When analysed together with price movements, they can help traders understand changes in market activity and outstanding positions.

    Disclaimer: This article is for educational purposes only and does not constitute financial or investment advice. Cryptocurrency derivatives involve significant risks, including the possibility of losing your entire margin.

  • Funding Rates in Crypto Futures: How They Work

    Funding Rates in Crypto Futures: How They Work

    Introduction

    Crypto futures allow traders to speculate on the price movements of cryptocurrencies without necessarily owning the underlying assets. Among these products, perpetual futures are particularly popular because they do not have a fixed expiry date.

    However, perpetual futures use a mechanism called funding rates to help keep contract prices close to the underlying spot market price.

    Funding payments move between traders holding long and short positions. Depending on the funding rate, one side pays the other.

    Understanding funding rates is important because they can affect trading costs, especially when a position remains open for an extended period.

    In this lesson, you will learn what funding rates are, how they work, why they change, and what traders should consider before entering a perpetual futures position.

    What Is a Funding Rate in Crypto Futures?

    A funding rate is a periodic payment mechanism used by many perpetual futures contracts.

    Its main purpose is to help keep the perpetual contract price aligned with the underlying cryptocurrency’s spot price.

    Unlike traditional futures contracts, perpetual futures do not have an expiry date. Therefore, exchanges use funding payments to encourage the contract price to stay close to the spot market price.

    Funding payments are exchanged between traders holding long and short positions. The exchange generally facilitates the payment rather than collecting it as a conventional trading fee, although the exact process depends on the platform.

    How Do Funding Rates Work?

    Funding rates generally depend on the difference between the perpetual futures price and the spot price.

    There are two common situations:

    1. Positive Funding Rate

    A positive funding rate generally means traders holding long positions pay traders holding short positions.

    This situation often occurs when the perpetual futures contract trades above the spot price.

    For example, imagine a trader holds a long position worth ₹1,00,000 and the funding rate is +0.01%.

    The funding payment would be:

    ₹1,00,000 × 0.01% = ₹10

    The long trader pays ₹10 to the short side, assuming the position and funding amount remain unchanged at settlement.

    2. Negative Funding Rate

    A negative funding rate generally means traders holding short positions pay traders holding long positions.

    This situation can occur when the perpetual futures contract trades below the spot price.

    For example, imagine a trader holds a short position worth ₹1,00,000 and the funding rate is -0.01%.

    The funding payment would be:

    ₹1,00,000 × 0.01% = ₹10

    In this case, the short trader pays ₹10 to the long side.

    Remember: Positive and negative funding rates indicate which side pays. They do not guarantee that the market will move in a particular direction.

    Positive vs Negative Funding Rates

    FeaturePositive funding rateNegative funding rate
    Payment directionLong pays shortShort pays long
    Common market conditionFutures price above spot priceFutures price below spot price
    Possible interpretationGreater demand for long exposureGreater demand for short exposure
    Payment received byShort positionsLong positions

    These are general interpretations. Funding calculations and payment conditions can vary between exchanges.

    Why Do Funding Rates Change?

    Funding rates are not fixed. They can change as market conditions and trader positioning change.

    Here are some common factors:

    1. Market Demand

    When more traders want to open long positions, demand for perpetual futures may increase. Consequently, the contract may trade above the spot price, contributing to positive funding.

    Similarly, stronger demand for short positions may contribute to negative funding.

    2. Market Sentiment

    During periods of strong optimism, traders may use more leveraged long positions. As a result, funding rates may become positive.

    On the other hand, negative sentiment can increase demand for short positions and influence funding rates in the opposite direction.

    3. Price Differences

    Funding mechanisms consider the relationship between perpetual futures prices and spot prices.

    When this difference changes, the funding rate may also change according to the exchange’s calculation method.

    4. Volatility and Leverage

    During volatile market conditions, traders may rapidly change their positions. This can influence futures demand and funding rates.

    Therefore, funding rates can change quickly, particularly when market sentiment shifts.

    How Do Funding Rates Affect Trading Costs?

    Funding payments can increase or reduce the cost of holding a perpetual futures position.

    For example, imagine a trader keeps a long position worth ₹2,00,000 open during three funding periods. If the funding rate remains +0.01% for each period, the estimated payment is:

    Funding periodFunding payment
    First period₹20
    Second period₹20
    Third period₹20
    Total₹60

    This example assumes the position’s funding notional remains unchanged.

    However, actual funding payments may differ because position value, funding rates, and settlement conditions can change.

    Also, funding is separate from other trading costs, such as:

    • Trading fees
    • Bid-ask spreads
    • Slippage
    • Liquidation-related costs, where applicable

    Consequently, traders should consider the total cost of holding a position rather than looking only at its entry price.

    How Can Traders Check Funding Rates?

    Most crypto futures platforms display funding information within their perpetual futures trading interface.

    Before entering a position, traders should check:

    1. Current funding rate: Understand whether the rate is positive or negative.
    2. Next funding time: Check when the next payment is scheduled.
    3. Funding history: Review previous rates to understand how they have changed.
    4. Payment calculation: Confirm which position value the exchange uses.
    5. Exchange rules: Check whether the platform can adjust funding intervals or calculation methods.

    Funding rates can change before the next payment period. Therefore, a displayed rate should not always be treated as a guaranteed future payment.

    Common Mistakes Beginners Should Avoid

    Funding rates are useful, but beginners can easily misunderstand them.

    Avoid these mistakes:

    • Assuming positive funding means Bitcoin’s price will increase.
    • Treating negative funding as a guaranteed buying opportunity.
    • Ignoring funding costs when holding positions for several periods.
    • Assuming every exchange uses the same funding calculation.
    • Opening leveraged positions only to receive funding payments.
    • Confusing funding payments with regular trading fees.

    Instead, review funding rates alongside market conditions, position size, and your overall trading plan.

    Frequently Asked Questions

    What is a funding rate in crypto?

    A funding rate is a periodic payment mechanism used by perpetual futures contracts. It helps keep contract prices close to the underlying spot market price.

    Who pays funding fees in crypto futures?

    The payment direction depends on the funding rate. Generally, long traders pay short traders when the rate is positive, while short traders pay long traders when it is negative.

    Does a positive funding rate mean the market is bullish?

    Not necessarily. Positive funding may indicate stronger demand for long positions, but it does not guarantee that prices will rise.

    Are funding rates the same on every exchange?

    No. Exchanges may use different funding formulas, payment intervals, limits, and settlement rules. Always check the specific platform’s documentation.

    Can funding rates cause losses?

    Yes. Funding payments can increase the cost of holding a position. In addition, futures prices can move against a trader, creating losses independent of funding.

    Disclaimer: This article is for educational purposes only and does not constitute financial or investment advice. Crypto futures involve significant risk, including the possibility of losing your entire margin. Funding rates and exchange rules can change.

  • Why you should never trade without a plan?

    Why you should never trade without a plan?

    Introduction

    Have you ever entered a crypto trade because the price was rising quickly, only to feel confused when the market suddenly moved in the opposite direction?

    This can happen when traders make decisions without a clear plan. Crypto markets can move rapidly, and emotions such as fear, greed, and excitement can influence trading decisions.

    A trading plan helps you decide what you want to achieve, when to enter or exit a trade, how much to risk, and how to respond when the market changes.

    Although a trading plan cannot guarantee profits, it can help you make more consistent decisions and manage risk more carefully.

    Let’s explore why every trader should develop a plan before placing a trade.

    What Is a Trading Plan?

    A trading plan is a set of rules that guides your trading decisions.

    It defines your objectives, entry and exit conditions, position size, acceptable loss, and method for reviewing your results.

    Instead of reacting to every market movement, you follow predefined rules that reflect your strategy and risk tolerance.

    For example, before buying a cryptocurrency, you might decide:

    • Why the trade fits your strategy.
    • At what price or under what conditions you will enter.
    • When you will exit if the trade moves in your favour.
    • When you will exit if the trade moves against you.
    • How much money you are willing to risk.
    • How you will evaluate the trade afterwards.

    As a result, you have a clearer framework for making decisions before emotions take over.

    Why Should You Never Trade Without a Plan?

    Trading without a plan can lead to inconsistent decisions and unnecessary risk. Here are some important reasons to prepare one before entering the market.

    1. It Helps You Control Emotions

    Crypto prices can rise or fall quickly. When prices surge, you may feel pressured to buy immediately. Similarly, when prices drop, fear may push you to sell without considering your original strategy.

    A trading plan gives you predefined rules to follow.

    For example, if a coin rises sharply, your plan can help you assess whether the trade still meets your entry conditions instead of buying simply because you fear missing out.

    Therefore, planning can help you respond more thoughtfully to market movements.

    2. It Defines Your Entry and Exit Rules

    Without clear entry and exit rules, you may enter trades impulsively or hold losing positions longer than intended.

    A trading plan defines the conditions that must exist before you enter a trade. It also identifies when you will take profits or exit if the trade no longer meets your expectations.

    For instance, you might decide to enter only after a specific price pattern appears and exit if the market breaks your predefined risk limit.

    However, remember that market conditions can change, and actual execution prices may differ from your expectations.

    3. It Helps You Manage Risk

    Every trade carries risk. A trading plan helps you decide how much exposure you can accept before committing your money.

    For example, you could set a maximum amount that you are prepared to lose on an individual trade. You can then use that limit to calculate an appropriate position size.

    This approach helps prevent a single trade from exposing too much of your trading capital.

    However, a planned loss limit does not guarantee that your final loss will stay within that amount. Fast market movements, gaps in liquidity, and execution issues can affect the outcome.

    4. It Reduces Impulsive Trading

    Impulsive trading happens when you make decisions without following a consistent process.

    For example, after losing a trade, you might immediately enter another position to recover your money. Traders often call this behaviour revenge trading.

    A trading plan can help you establish rules for taking a break after losses or stopping when you reach a daily loss limit.

    Consequently, you can avoid making additional decisions simply to recover previous losses.

    5. It Makes Your Results Easier to Review

    A trading plan gives you a consistent basis for evaluating your performance.

    After each trade, record your entry, exit, position size, reason for entering, and final result. Then compare your actions with your original plan.

    Over time, this process can help you identify recurring mistakes and understand which parts of your strategy need improvement.

    Nevertheless, a few successful trades do not prove that a strategy will remain profitable. Review enough information before drawing conclusions.

    What Should a Trading Plan Include?

    A useful trading plan should cover the following elements.

    1. Trading Objectives

    Start by defining your objective.

    Are you practising a strategy, learning how orders work, or following a specific trading approach? Clear objectives help you determine which actions fit your plan.

    Avoid setting unrealistic profit targets simply because you want quick results.

    2. Entry Conditions

    Specify the conditions that must exist before you enter a trade.

    For example, you might use a particular chart pattern, price level, or combination of indicators. Define your criteria in advance so you do not change them merely because the market moves quickly.

    3. Exit Conditions

    Decide when you will close a position.

    Your plan should cover both favourable and unfavourable outcomes. For example, you might define a target for taking profits and a condition for exiting when the trade moves against you.

    However, no exit method can guarantee a particular execution price.

    4. Position Sizing

    Position sizing determines how much of an asset you buy or sell in a trade.

    Your position size should reflect your risk limit, the distance to your planned exit level, and your available trading capital.

    For example, a trader with a small acceptable loss per trade generally needs a smaller position when the distance to the stop-loss level is larger.

    5. Maximum Acceptable Loss

    Decide how much you can afford to lose on an individual trade and when you will stop trading for a session or day.

    These limits can help you avoid taking excessive risks after a series of losses.

    Importantly, never risk money you need for essential expenses.

    6. Review Criteria

    Decide how you will evaluate your trades.

    Keep a trading journal and record whether you followed your plan, what happened, and what you learned. Review your results regularly rather than changing your strategy after every small loss.

    A Simple Example of a Trading Plan

    Imagine a trader has ₹20,000 set aside as trading capital.

    Before entering a hypothetical trade, the trader creates these rules:

    Plan elementExample decision
    Trading objectiveFollow a predefined short-term strategy
    Entry conditionEnter only when the selected setup appears
    Planned entry price₹100 per unit
    Planned exit if wrong₹95 per unit
    Maximum planned loss₹200, before fees and slippage
    Position size40 units
    Review methodRecord the outcome and check whether the rules were followed

    The planned loss is ₹5 per unit. With 40 units, the loss would be ₹200 if the trader exits at ₹95 and the order executes at that price.

    However, actual losses could be higher because fees and slippage affect execution. A stop-loss order also does not guarantee execution at its trigger price.

    This example illustrates how traders can connect position sizing with a predefined risk limit. It does not guarantee a successful trade.

    Common Trading Plan Mistakes

    Setting unrealistic profit targets: Unrealistic expectations can encourage unnecessary risk-taking.

    Changing rules during every trade: Constantly abandoning your plan makes it harder to evaluate your strategy consistently.

    Ignoring position sizing: Even a well-researched trade can create excessive risk if the position is too large.

    Trading to recover losses: Increasing risk after a loss can make an already difficult situation worse.

    Failing to review results: Without reviewing your decisions, you may repeat the same mistakes.

    Assuming a plan guarantees profits: A plan supports discipline and risk management, but it cannot eliminate market risk.

    FAQs

    What is a trading plan?

    A trading plan is a set of rules that guides when you enter and exit trades, how much you trade, how you manage risk, and how you review your results.

    Can a trading plan guarantee profits?

    No. Markets remain unpredictable, and even a carefully prepared plan can result in losses. A plan helps structure decisions and manage risk rather than guarantee returns.

    Why is risk management important in crypto trading?

    Crypto markets can experience rapid price movements. Risk management helps traders decide how much exposure they can accept and how to respond when trades move against them.

    Should beginners create a trading plan?

    Yes. A clear plan can help beginners practise consistent decision-making, understand risk, and avoid impulsive trades. Beginners can also practise with simulated trades before risking real money.

    What is the difference between a trading strategy and a trading plan?

    A trading strategy describes the conditions or methods used to identify trades. A trading plan is broader: it includes the strategy along with position sizing, risk limits, entry and exit rules, and performance reviews.

    Disclaimer

    This article is for educational purposes only and does not provide financial or investment advice. Cryptocurrency trading involves substantial risk, and losses can exceed planned limits under certain market conditions. Always understand the risks before trading.

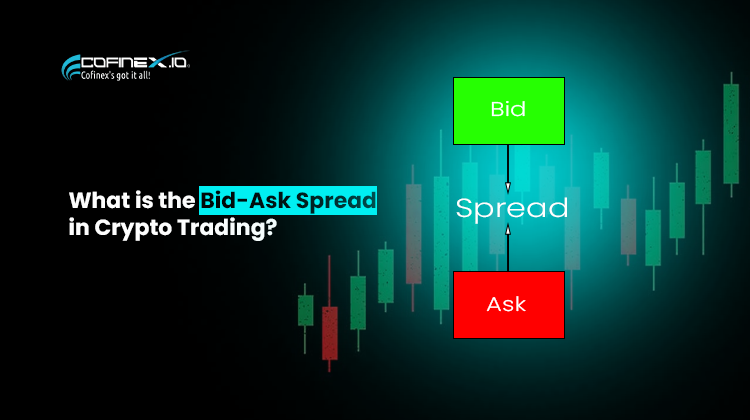
  • What is the Bid-Ask Spread in Crypto Trading?

    What is the Bid-Ask Spread in Crypto Trading?

    Introduction

    When you buy or sell cryptocurrency, the price you see on a trading platform may differ depending on whether you want to buy or sell. This difference relates to an important trading concept called the bid-ask spread.

    The bid is the highest price a buyer currently offers to pay for an asset. In contrast, the ask is the lowest price a seller currently accepts.

    The difference between these two prices is the bid-ask spread. It helps traders understand market liquidity and one of the costs involved in trading.

    Let’s explore how the bid-ask spread works, why it matters, and how you can interpret it as a beginner.

    What Is the Bid-Ask Spread?

    The bid-ask spread is the difference between the highest displayed buying price and the lowest displayed selling price for an asset.

    • Bid price: The highest price a buyer currently offers.
    • Ask price: The lowest price a seller currently requests.
    • Bid-ask spread: The difference between the ask price and the bid price.

    For example, suppose a crypto trading pair displays the following prices:

    • Bid price: ₹99,900
    • Ask price: ₹100,000

    The spread is ₹100.

    This means the lowest displayed selling price is ₹100 higher than the highest displayed buying price.

    However, these prices can change as traders place, modify, or cancel orders.

    How Do You Calculate the Bid-Ask Spread?

    You can calculate the bid-ask spread using a simple formula:

    Bid-ask spread = Ask price − Bid price

    For example, imagine the BTC/INR market shows these prices:

    DetailPrice
    Highest bid₹90,00,000
    Lowest ask₹90,10,000
    Bid-ask spread₹10,000

    To calculate the spread, subtract the bid price from the ask price.

    ₹90,10,000 − ₹90,00,000 = ₹10,000

    Therefore, the bid-ask spread is ₹10,000 per BTC at those displayed prices.

    What Is the Spread Percentage?

    Traders can also express the spread as a percentage to compare markets with different prices.

    A common calculation uses the midpoint between the bid and ask:

    Spread percentage = (Spread ÷ Midpoint) × 100

    In the example above, the midpoint is ₹90,05,000.

    The spread percentage is approximately 0.0111%.

    This percentage helps you compare the spread relative to the asset’s price. However, it does not include other trading costs, such as exchange fees or slippage.

    Why Does the Bid-Ask Spread Matter?

    The bid-ask spread matters because it can affect the price at which you buy or sell an asset.

    1. It Affects Trading Costs

    Suppose you buy an asset at the lowest ask price and immediately sell it at the highest bid price. If the displayed prices remain unchanged, you would receive less than you paid.

    The difference reflects the spread’s immediate impact, excluding trading fees and other costs.

    Therefore, traders should consider the spread when estimating the cost of entering and exiting a position.

    2. It Provides Clues About Liquidity

    A narrow spread often indicates that buyers and sellers are competing closely on price. This situation commonly occurs in markets with strong liquidity.

    On the other hand, a wide spread may indicate limited liquidity, greater uncertainty, or less competition between buyers and sellers.

    However, the spread alone cannot tell you everything about a market’s liquidity. You should also consider order-book depth and available quantities.

    3. It Matters for Frequent Traders

    Frequent traders may pay more attention to the bid-ask spread because they enter and exit positions more often.

    Even a small spread can affect their overall trading costs when they execute many trades.

    Consequently, comparing spreads across trading pairs may help traders understand the costs associated with different markets.

    What Causes the Bid-Ask Spread to Change?

    The bid-ask spread does not remain fixed. Several factors can influence it.

    1. Market Liquidity

    When a market has many active buyers and sellers, their orders may sit closer together. As a result, the spread may become narrower.

    In less liquid markets, buyers and sellers may place orders farther apart, creating a wider spread.

    2. Market Volatility

    During rapid price movements, traders may change or cancel orders quickly.

    Consequently, the gap between the highest bid and lowest ask may widen or fluctuate as market participants respond to changing conditions.

    3. Trading Volume and Activity

    Higher trading activity can attract more competing orders. However, high trading volume does not always guarantee a narrow spread.

    For this reason, traders should examine the actual bid and ask prices rather than relying on volume alone.

    4. Order Size and Market Depth

    The best bid and ask show prices for available quantities, not unlimited amounts.

    A large order may consume several price levels in the order book. Therefore, the final execution price may differ from the best displayed price, even when the initial spread looks narrow.

    Bid-Ask Spread vs Slippage

    Although the bid-ask spread and slippage both affect trading costs, they describe different things.

    FeatureBid-Ask SpreadSlippage
    MeaningDifference between the best displayed ask and bidDifference between the expected and actual execution price
    Main causeGap between buyers’ and sellers’ pricesPrice movement and available liquidity during execution
    When it mattersWhen evaluating displayed market pricesWhen evaluating the actual result of an order
    Can it change?Yes, as the order book changesYes, depending on market conditions and execution

    For example, the spread may be narrow when you place an order. However, if the market moves quickly or your order consumes multiple price levels, you may still experience slippage.

    Therefore, understanding both concepts gives you a clearer picture of trading costs.

    How Can Beginners Check the Bid-Ask Spread?

    Before placing a trade, you can review a few details on your trading platform.

    1. Find the order book: Look for the list of current buy and sell orders.
    2. Identify the highest bid: This is the highest displayed buying price.
    3. Identify the lowest ask: This is the lowest displayed selling price.
    4. Calculate the difference: Subtract the bid from the ask.
    5. Compare the spread: Check how the spread changes over time or across trading pairs.

    Additionally, review the quantities available at each price level. A narrow spread may not be enough to accommodate a large order.

    Common Beginner Mistakes

    Confusing the bid with the ask: The bid represents the highest displayed buying price, while the ask represents the lowest displayed selling price.

    Assuming a narrow spread means zero costs: Trading fees and slippage can still affect your final result.

    Ignoring order-book depth: The displayed best prices may apply to only a small quantity.

    Assuming high volume always means a narrow spread: Actual market conditions determine the spread.

    Forgetting that prices change: The bid and ask can move quickly, particularly during volatile markets.

    FAQs

    What is the bid-ask spread in simple words?

    It is the difference between the highest displayed buying price and the lowest displayed selling price for an asset.

    Is a lower bid-ask spread better?

    A lower spread generally reduces the gap between the best displayed buying and selling prices. However, you should also consider order-book depth, trading fees, and potential slippage.

    What does a wide bid-ask spread mean?

    A wide spread may indicate limited liquidity, greater uncertainty, or less competition between buyers and sellers. However, the spread can widen for several reasons.

    Do I pay the bid-ask spread as a separate fee?

    Usually, the spread is not a separate fee charged by the exchange. Instead, it represents the difference between displayed buying and selling prices. However, it can affect the price you receive when trading.

    Is the bid-ask spread the same as slippage?

    No. The spread measures the gap between the best displayed bid and ask. Slippage measures the difference between an expected price and the actual execution price.

    Disclaimer

    This article is for educational purposes only and does not provide financial or investment advice. Cryptocurrency markets can change rapidly, and spreads, liquidity, fees, and execution prices vary by platform and market conditions.

  • Understanding Support and Resistance in Crypto Trading

    Understanding Support and Resistance in Crypto Trading

    Introduction

    When you look at a crypto price chart, you may notice that prices sometimes stop falling near a particular area and start rising again. Similarly, prices may struggle to move higher after reaching certain levels.

    Traders often study these areas using two important concepts: support and resistance.

    Support is a price area where buying interest may slow a decline. In contrast, resistance is a price area where selling interest may slow a price increase.

    However, neither level guarantees that the price will reverse. Market conditions can change, and prices can break through both support and resistance.

    In this lesson, you’ll learn how these levels work, how traders identify them, and what beginners should understand before using them.

    What Is Support in Crypto Trading?

    Support is a price area where buying interest may increase enough to slow or temporarily stop a price decline.

    For example, imagine Bitcoin falls towards ₹80,00,000. Buyers begin purchasing near that area, and the price starts moving upward.

    If the price reacts similarly around that area on several occasions, traders may identify it as a support zone.

    However, support does not mean the price cannot fall further. If selling pressure becomes stronger than buying interest, the price may break below the zone.

    Why Does Support Form?

    Several factors can contribute to support:

    • Buying interest: Some traders consider an asset attractive when its price reaches a particular area.
    • Previous price reactions: Traders may watch areas where the price previously stopped falling or bounced upward.
    • Market psychology: Round numbers and widely watched price levels can influence trading decisions.
    • Trading activity: Increased buying activity around a price area may help slow a decline.

    As a result, traders often watch support zones to understand how the market responds to falling prices.

    What Is Resistance in Crypto Trading?

    Resistance is a price area where selling interest may increase enough to slow or temporarily stop a price rise.

    For example, suppose Bitcoin rises towards ₹85,00,000. Some traders sell near that area, and the price begins to fall.

    If the market shows similar reactions around that area repeatedly, traders may identify it as a resistance zone.

    Nevertheless, resistance does not guarantee a price decline. If buying demand becomes strong enough, the price may break above the zone.

    Why Does Resistance Form?

    Resistance can develop for several reasons:

    • Selling interest: Some traders may choose to sell when the price reaches a particular level.
    • Previous price reactions: Traders often watch areas where earlier price increases slowed or reversed.
    • Profit-taking: Traders who bought at lower prices may sell to realise profits.
    • Market psychology: Widely watched price levels can attract buying and selling activity.

    Therefore, resistance zones can help traders identify areas where the market may face selling pressure.

    Support vs Resistance: Key Differences

    FeatureSupportResistance
    LocationOften below the current priceOften above the current price
    Market pressureBuying interest may slow a declineSelling interest may slow an advance
    Possible reactionPrice may bounce upwardPrice may pull back downward
    Breakout directionPrice may break below supportPrice may break above resistance
    ReliabilityNot guaranteed to holdNot guaranteed to hold

    Remember that support and resistance represent price areas, not fixed barriers. Their significance depends on market conditions and price behaviour.

    A Simple Example of Support and Resistance

    Imagine a cryptocurrency trades between ₹100 and ₹120 for several days.

    During this period:

    • The price falls towards ₹100 and then rises several times.
    • The price climbs towards ₹120 and then falls several times.

    Traders may interpret ₹100 as a support zone and ₹120 as a resistance zone.

    If the price approaches ₹100 again, traders may watch whether buying interest appears. Similarly, when the price approaches ₹120, they may observe whether selling pressure increases.

    However, the price could break below ₹100 or above ₹120 at any time. Therefore, traders should not assume that the same pattern will continue indefinitely.

    How Do Traders Identify Support and Resistance?

    Traders use several methods to identify potential support and resistance zones.

    1. Look at Previous Price Reactions

    First, examine the price chart and look for areas where the price repeatedly stopped falling or rising.

    For example, several upward reactions near a similar price may suggest a potential support zone.

    Likewise, repeated downward reactions near a similar price may indicate possible resistance.

    2. Identify Price Zones, Not Just Exact Numbers

    Support and resistance rarely work as perfectly precise lines.

    Instead, traders often mark a zone that covers several nearby price reactions. This approach recognises that buying and selling activity can occur across a range of prices.

    3. Observe Trading Volume

    Trading volume shows how much of an asset traders exchange during a particular period.

    Some traders examine volume when the price approaches a support or resistance zone. A change in volume may provide additional context, although volume alone cannot confirm whether a level will hold or break.

    4. Use Different Timeframes

    A price area that matters on a short-term chart may not carry the same significance on a longer-term chart.

    For this reason, traders sometimes compare multiple timeframes to understand the broader price structure.

    However, no timeframe guarantees a more accurate outcome.

    What Happens When Support or Resistance Breaks?

    Sometimes, the price moves through a support or resistance zone instead of reversing.

    Support Breaks

    When the price moves below support, it may indicate that selling pressure has increased. Some traders then watch whether the price continues falling or returns above the zone.

    In certain situations, a broken support zone may later act as resistance.

    Resistance Breaks

    When the price moves above resistance, it may indicate stronger buying pressure. Traders may then watch whether the price continues rising or falls back below the zone.

    In some cases, a broken resistance zone may later act as support.

    This behaviour is often called role reversal. However, it does not happen every time, and a brief move beyond a level may turn out to be a false breakout.

    Common Beginner Mistakes

    Treating levels as guarantees: Support can break, and resistance can fail.

    Drawing too many lines: Marking every small price movement can make a chart confusing. Focus on meaningful price reactions instead.

    Ignoring market conditions: News, volatility, liquidity, and broader market trends can influence how prices behave around these zones.

    Assuming every breakout will continue: Some breakouts reverse quickly. Traders should consider the wider market context.

    Relying on one signal alone: Support and resistance provide context, but they do not predict future prices with certainty

    FAQs

    What is support in crypto trading?

    Support is a price area where buying interest may slow a decline or encourage a temporary upward reaction.

    What is resistance in crypto trading?

    Resistance is a price area where selling interest may slow a price increase or encourage a temporary downward reaction.

    Can support become resistance?

    Yes. After the price breaks below a support zone, that zone may act as resistance if the price later returns to it. However, this behaviour is not guaranteed.

    Can resistance become support?

    Yes. When the price breaks above resistance, that zone may later act as support if the price returns to it.

    Is support and resistance enough to make a trading decision?

    No. These concepts help traders interpret price behaviour, but they cannot guarantee an outcome. Traders should also consider risk management, market conditions, and other relevant information.

    Disclaimer

    This article is for educational purposes only and does not provide financial or investment advice. Cryptocurrency markets are volatile, and support and resistance levels can fail. Always understand the risks before making trading decisions.